Sunday, August 28, 2011

Mooncake Festival, where's my lantern?

Soon it will be Mooncake festival again, this is a Chinese Mid Autumn Festival to celebrate the Lunar moon and the Moon Goddess.

For me, I love this festival as it reminds me of my childhood days of eating mooncakes and walking around the neighbourhood parading our lighted lanterns. I have such fond memories of choosing which lantern to buy. In Malaysia, shops sells the lanterns prior to festival. Of course it is not as big an event as the Festival of Lanterns during Chinese New Year but still a lot of fun to be had for the kiddies. I remember that I had a fish shaped lantern, dragon shaped ones were most popular. We would walked around the neigbourhood at dusk lighting up the streets with our lanterns and stopping to admire each other lanterns.

For the grownups, they get to exchange, gift each other mooncakes to friends and family. Mooncake is a delicacy eaten, cut in wedges with a cup of chinese tea. It is like a pastry cake filled with fillings of various dense paste like lotus, red bean or sesame. There's usually a yolk inside to symbolise the moon.

My parents usually offer our guest mooncakes to eat when they visit. I think it much more fun for the kids really. We get to stay up late and run around showing off our lanterns. Of course, there's always tears when somebody's lantern goes up in flames. Hahhahaa, this happens a lot in the old days. Nowadays you can buy the battery operated tealight for your lantern, it will save your lantern from going up in flames if you knocked over the candle inside.

Okay, I digress... I don't have a mooncake recipe, so this post is just a food porn, but I am sure if you google it and have the mould for the pastry, you'll be able to make one or two yourself. Since I am in Regional country area, sigh.....I opted for online shopping and found an Asian grocer that sells mooncake. I bought some and here are the photos of the mooncake, I will have to see about catching a pic of the moon next ;) Wishing for a telephoto superzoom lens next... hint hint Moon Goddess..;)



Wednesday, August 24, 2011

My Jill-e Bag

I love my new Jill-e bag, loving the fresh smell of leather and I bought the small red, for those wondering..... I was contemplating buying the bone colour but agreed that it would get dirty too fast. Oh yeah, this is not a food related post, just introducing my new camera bag to my readers. I love it so much!

I can fit three lenses in there with another lens attached to my Canon EOS camera, a medium bag would have been too big for me. From now on, I will only use the Canon backpack if I want to take all my lenses with me. That backpack is so big and heavy, it's painful for my shoulders ;(

This is my pressie to myself ;)


Love ....love ....love.....Just stunning!!! My bag that is!

Sunday, August 21, 2011

Vanilla cupcakes with Strawberry Buttercream frosting


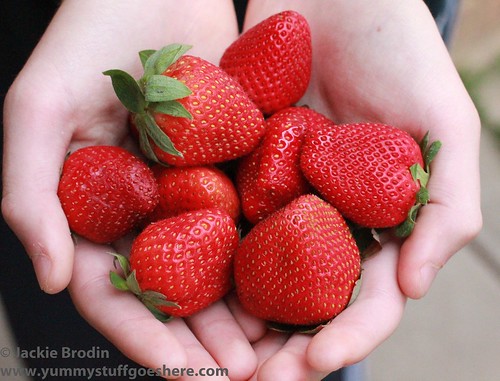
Strawberries


To make up for the lost of time from last weekend for when I was sick, I did lots this weekend ;)

I went shopping, then some photography then some more shopping but at the garden nursery and then came home to do baking, now blogging... heheh... oh wait, I also have to catch up on some movies recorded on MyStar, errr, .........once I get around to understanding the instruction...translation in English please...S.L.O.W.L.Y...

For those wondering, I get fixing computers, but I don't know how to use a VCR or DVD player etc...LOL ;) Brainfart!!

Oh dear, I digress, yes back to me now...here, look at some pretty pics form my baking, this recipe is adapted from Taste.com who adapted it from Honey and Jam blog... LOL ;) Cracks me up! But we must give credit where it's due....BTW, I am taking this to work tomorrow... ;)

Bakes 12 Vanilla Cupcakes with Strawberry Frosting

Ingredients:

  • For the Vanilla Cupcakes:
  • 1 cup sugar
  • 1/2 cup butter, softened
  • 2 large eggs
  • 1/2 tsp vanilla extract
  • 1/8 tsp almond extract
  • 1 1/2 cups cake flour
  • 3/4 tsp baking powder
  • 1/8 tsp salt
  • 1/2 cup buttermilk
  • .
  • For the Strawberry Vanilla Buttercream Frosting:
  • 1/2 cup butter, softened
  • 1 tsp vanilla extract
  • 1/8 tsp salt
  • 1 (16 oz) package powdered sugar
  • 1/2 cup of fresh strawberries, chopped or processed in blender, I cooked mine in caster sugar.
  • additional strawberries cut in half to garnish

Preparation:

Preheat oven to 350 degrees F.

Beat sugar and butter at medium speed with a heavy-duty electric stand mixer until creamy and fluffy, about 5 minutes. Add eggs, 1 at a time, beating until yellow disappears after each addition. Beat in vanilla and almond extracts.

Whisk together flour, baking powder and salt in a small bowl; add to sugar mixture alternately with buttermilk, beginning and ending with flour mixture. Beat a medium-low speed just until blended after each addition (the batter will be thick).

Line a 12-cupcake pan with paper cupcake liners. Divide the batter evenly between the liners. Bake for about 20 minutes in the preheated oven, or until a toothpick inserted into the center of a cupcake comes out clean. Cool on a rack before frosting.

To Make the Strawberry Vanilla Buttercream Frosting:

Beat the first 3 frosting ingredients at medium speed with an electric mixer until creamy. Gradually add powdered sugar alternately with strawberries, beating at low speed until blended and smooth after each addition. Spread on cooled cupcakes.


Friday, August 19, 2011

Beef Rendang

It's Friday, it's been kinda a long week for me, okay I was sick last weekend and had sickies for Monday and Tuesday. So The last thing I want on a Friday is to spend hours in the kitchen. I just want a quick meal and watch my movies. But I also wanted something a tiny bit spicy, not too much as I had a suspected case of tonsilitis last week. Seriously, I am dying for some kickass chillies but must be kind to my throat.

So I remembered Jackie from Jackie M  had sent me some curry paste and one of them was the mild rendang!!! Yipppeeee!! Couldn't be better... ;)

It was so damn easy to cook, follow the instructions, add meat and coconut milk/cream. Dinner was ready in half hour, it was only long coz I added too much water and left it on longer to simmer for reduction of liquid. Take a look at the pics. And please if you are working like me and have no time to be making marinades and paste, just buy them online, she delivers them by express couriers in foam box with chill pack. The package arrived intact and secure with no spillage. Just awesome!


Nom nom nom... my throat will be happy and so will I.. haven't had spicy food for a week ;) Later! Gonna feed my face now .....

Saturday, August 13, 2011

Bubur Pulut Hitam


I woke up with a sore throat this morning and just wanted soupy stuff today. There will be no chillies or fried stuff for me today, ....SAD....just something soft and wet like bubur pulut hitam.

Spring is almost here with pretty blossoms out blooming early already, I had wanted to head out to shoot some blossoms at the gardens. Instead, on my first sunny weekend, (yes, no rain, shocking, ain't it? ) I've a sore throat, feeling really bummed out at the moment.

So as a consolation prize, I cooked pulut hitam and went to watch some movies in bed. Fell asleep. What a waste of a good Saturday ;(

The good thing with this dessert is that it will fix my sugar crave and the black glutinuos rice will fill me up as I don't feel like eating any solids at the moment.

Recipe is adapted from Bee's website http://nyonyafood.rasamalaysia.com/bee-koh-moy-bubur-pulut-hitam/

God! I feel like I have swallowed a box full of razor blades or smething.. yes, this is my self pity post.. ;)

200g  black sticky (glutinous) rice
Sugar to taste
5 cups water
2 pandan leaves, knotted
1 cup coconut milk plus 1/2 teaspoon salt (mix well)
Method:

  1. Rinse the black sticky rice with water thoroughly until the water turns clear. Please take note that the color will remain “black” or “purple” in color but it should look clear.
  2. Add water and pandan leaves in a pot and bring it to boil. Add the black sticky rice into the pot and boil it on medium to low heat for 45-60 minutes or until the rice becomes soft and breaks up. Cover the pot with its lid.
  3. Keep checking the water level, if it’s become too dry, add more water.
  4. Add sugar to taste.
  5. Serve the bee koh moy in small bowls topped with a spoonful of coconut milk. If you like it creamier, add more coconut milk.


Saturday, August 6, 2011

Tokyo Dreaming

Lately, I have been surfing the net looking at airfares to Japan. I have been wanting to revisit Tokyo for a while now. Even before and after the quake, I still want to go on a holiday there. Yes, I do have radiation worries on my mind but meh, bygones that is miniscule worry...... compared to my wanting to go back to Edo for a visit.

I first went to Japan as a cabin crew with Singapore Airlines. That was many many many years ago now. Back in my heydays, I was a little jetsetter... LOL..... I remember running around Tokyo downtown with Chris and his bunch of friends from Tacoma Washington. I first met up with these exchange students, when they were in Singapore. We arranged to meet up again when I was doing a flight out to Tokyo.

It was great fun. We spend the day running around Harajuku looking at Elvis impersonators, amusement parks, Shinjuku and Ginza. Nite times were spent eating yakitori, drinking whisky and sakes and getting lost on subways, not knowing which train to get back to hotel. It was amazing how we even got back in one piece.

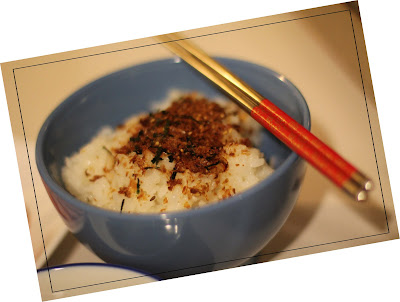
This post is more about my lamenting for those carefree days and wanting to go to Tokyo. Grrrr! It will take me forever to save up.. ;( Meanwhile I have to make my own Japanese meal at home and watch Japanese TV dramas like Tokyo Tower.

This was my dinner yesterday without the sakes. Sad!


Does anyone want to sponsor me to go back to Japan?
Related Posts Plugin for WordPress, Blogger...